What's New in Release 6.01Release 6.01, 5/31/2015 |
||||||||||||||||||||||||||
New Features and EnhancementsGeneralSourcing & Contract ManagementSupply Chain - Materials Management
Hot Tip: Changing Item Vendor UOM Conversion Factors Financials - Accounts Payable and General Ledger
Administration
ReportsProblem Resolutions
General
|
||||||||||||||||||||||||||


 |
 |
 |
|
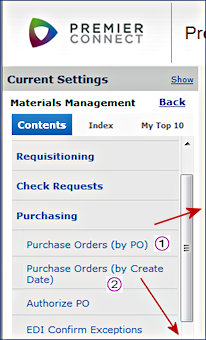
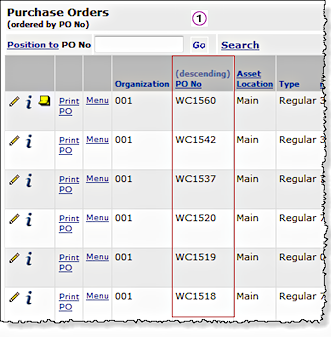
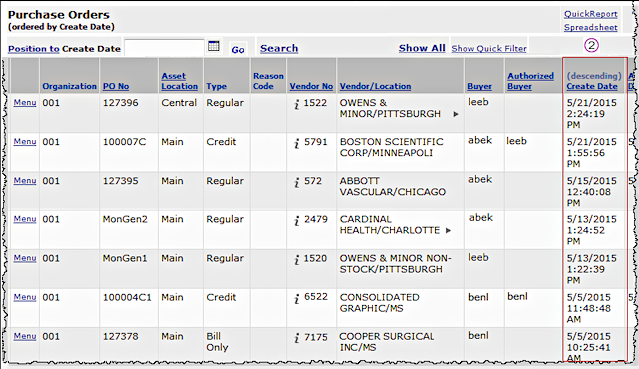
New Menu Options for the Purchase Order List Sorted in Different Ways
Materials Management main Contents > Purchasing > Purchase Orders (by PO) / Purchase Orders (by Create Date)
 On eMail purchase orders, the buyer who created the PO is automatically entered on the "CC" line.
Several features of working with GTINs have been added or improved.*
- A new menu item under Materials Management > Imports/Exports & Financials allows you to import GTINs into the system from a comma-delimited file (Figure 4).
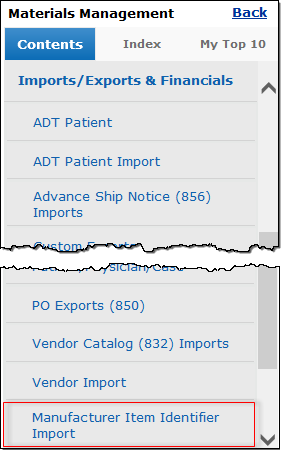
Manufacturer Item Identifier Import
- The UOM Conversion Factor has been added to the GTIN table.
- The GTIN UOM/Conversion Factor now appears on the Item Vendor UOM list. (MM > Inventory > Item Catalog > Menu > Item Vendor > Edit)
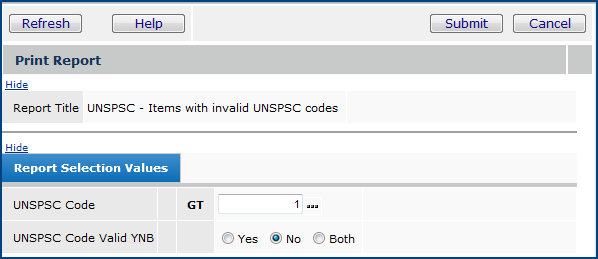
- A report object, "Manufacturer Item Identifiers (GTINs) Discrepancies" has been created, listing items for which the Item Vendor UOM and/or conversion factor does not match the GTIN UOM and/or conversion factor. (See New Report Objects, below.)
*For a detailed discussion of the new GTIN features, see "Work with GTIN Item Identifiers" in the online help.
Audit Pick Lists
A item has been added to the menu on the Pick Lists panel, allowing you to view audit information for a Pick List (Figure 5).
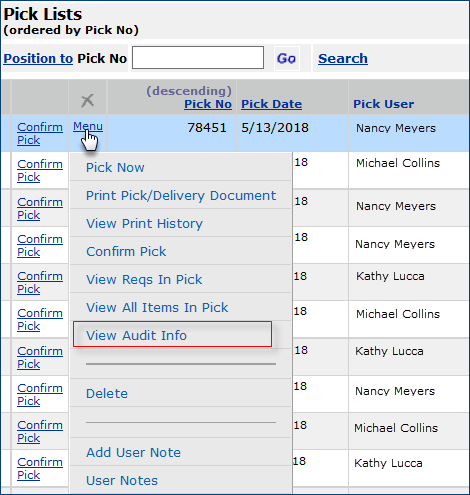
View Audit Info
MM > Warehousing > Pick List > Menu
On the Audit panel, you will see when the status of the Pick List was changed.
Financials - Accounts Payable and General Ledger
Journal voucher approval processing is available.
The journal voucher approvals process enables designated approvers to review and approve or reject manual journal vouchers created in General Ledger. Approval for a journal voucher can be required before (or after) the journal voucher is posted.
A journal voucher can be reviewed by a single “direct” approver or routed to several approvers in an approver group. In the routing process, the journal voucher amount is compared to each group member's maximum approval limit to determine if the person should review the journal voucher. Each group member can approve or reject journal vouchers up to his/her maximum limit. (Two approvers in the same group cannot have the same limit, however.)
Requiring Approvals
Approval requirements can be set up in different ways.
- A user
who creates a journal voucher can designate approver(s) on the journal voucher itself.
- The organization can specify approval requirements.
- Individual account codes for the organization can be flagged as requiring journal voucher approval.
- Journal vouchers for designated source journals can be flagged for approval.
- Journal vouchers whose profit effect exceeds a specified threshold can have approval required.
- The User Profile of a person who creates journal vouchers can require approval.
Approvers
Journal voucher approvers are designated as such on their User Profiles.
Each approver has an approval queue containing journal vouchers awaiting approval. An approver selects a JV from the queue for review, and approves or rejects it.
An approver can have the system send a notification when a JV is placed on the person's queue. Notification can also be sent to the creator of the journal voucher when it is approved or rejected.
A new role object "JVApprovalAdmin" -- set to Modify or higher -- controls access to approver setup.
Setup and usage instructions for this feature are in the online documentation topic: "Journal Voucher Approval Processing".
Mass approver maintenance is available for journal voucher approvers and approver groups.
A General Ledger feature creates maintenance jobs for mass changes to journal voucher approver groups (Figure 6)
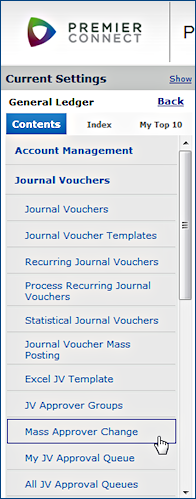
Accessing Mass Approver Changes from the GL Journal Vouchers Menu
The mass approver change feature lets you swap multiple approvers in and out of approver groups for journal voucher approvals.
You can change the members of approver groups; remove approvers from groups; and add new approvers to approver groups.
The remove function also lets you remove an approver as the direct approver for other users.
Similar to other "mass change" features in the system, you first create a "mass assignment" job, and specify the approver reassignments in the job. When the job runs, the changes take effect.
Details on using the mass maintenance feature are in the topic "Making Mass Approver Changes."
The Escheat Runs list includes State Codes with payments; State Code Totals are available for a run in any status.
The last column in the Escheat Runs List contains the State Codes for any states with a payment in the run. Figure 7 is an example. Notice that the second run has payments for several states.
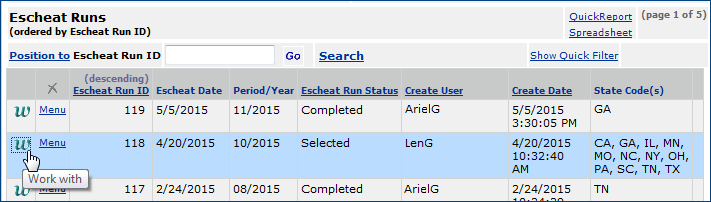
The Escheat Runs List
Accounts Payable > Payments > Escheats
To work with an escheat run, click w. The Work with Escheat Run panel appears (Figure 8).
Working with an Escheat Run
Accounts Payable > Payments > Escheats > w
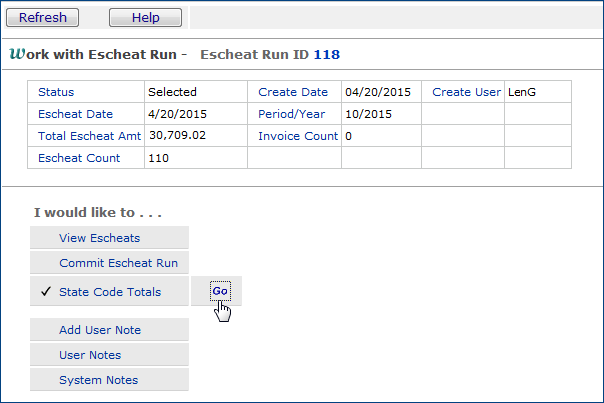
To display totals for all the state payments included in the run, click Go next to State Code Totals (Figure 8). A list of the totals appears (Figure 9). You can display the state totals for an escheat in any Status: Selected, Committed, etc.

Escheat Run State Totals
Accounts Payable > Payments > Escheats > w > State Code Totals > Go
Administration
When an administrator creates a new user record, the administrator's organization/department settings are initially applied by default for the new user.
When a new user is created in the system, the user's department and organization may not be known. So, the Data Profile settings of the person adding the user are automatically applied for the new user's department and organization. The user record can thus be edited by other staff for the correct department and organization. Once the department and organization are assigned, the user record is only
visible to other users who have access to the same department and organization data, based on their Data Profiles.
Reports
New reports/report objects.
- The new report object "Manufacturer Item Identifiers (GTINs) Discrepancies" (see above discussion) contains the following fields:
Asset Loc Item Vendor Conversion Factor Asset Loc Desc Item Vendor UOM Buy From Loc Mfr ID GTIN Conversion Factor Mfr Item No GTIN Discrepancy> Mfr Name GTIN UOM Org Identifier Number Org Desc Identifier Type Primary Supp Identifier Type Desc Vendor Item No Item Desc Vendor Name Item No Vendor No
Problem Resolutions
Supply Chain -- Materials Management
- Incorrect exception invoice lines were being written to an Excel spreadsheet and/or Quick Report.
When an exception was edited, and the user clicked Quick Report or the Excel icon , invoice lines appeared that were not for the invoice. This problem has been resolved so that correct invoice lines appear on the spreadsheet or Quick Report.
- Item Catalog Mass Maintenance: a comma in the Buy From Loc field was causing subsequent data in the field to be ignored.
The comma and any subsequent characters were not included in the in the field value, and the buy-from location name could not be validated by the system. The problem has been fixed so that buy-from location values that contain commas process correctly.
- Errors occur when killing a PO line quantity after a receipt for the line has been created and then canceled.
When a full receipt for a PO line has been created and then has been canceled, the line is unreceived. Previously, when users attempted to then cancel the unreceived quantity from the PO line, an error appeared. The error occurred because receipts (an original receipt and a cancel receipt) existed for the line. The PO quantity could not be killed.
To address this issue, the following has been designed and built into the system:
- When a receipt for a PO line is canceled, to kill the quantity on the line, open the PO Edit panel and click
Menu > Cancel Unreceived Qty. (No error appears.)
- The quantity is killed.
- The On Order Authorized Quantity for the item decreases by the amount cancelled/killed.
- If no other lines exist for the purchase order, its Status is Complete.
Financials -- Accounts Payable/General Ledger
-
Occasionally, vendors include invoice tax information in multiple segments within an EDI 810 document. When this was occurring, only the last tax segment processed was included in the invoice tax amount. This has been changed so that all tax segments are now accumulated and added to the Invoice tax amount.
Sourcing and Contract Management
- The contract delete process has been optimized to reduce the time it takes for contracts -- particularly those with many lines -- to be deleted from the system.
- To delete a supply contract, on the "Work with Contract" page Contract Info panel, click the delete icon .
.
Copyright © 2023 by Premier Inc. All rights reserved.